ERC20与QtumJS
在本章中,我们将使用 qtumjs构建一个NodeJS CLI工具,用于和前面部署的ERC20 token进行交互。
下载该project代码的链接:qtumproject/qtumbook-mytoken-qtumjs-cli.
目前,qtumjs依赖于qtumd的PRC服务,因此必须确保docker容器正在运行:
docker run -it --rm \
  --name myapp \
  -v `pwd`:/dapp \
  -p 9899:9899 \
  -p 9888:9888 \
  -p 3889:3889 \
  hayeah/qtumportal
注意NodeJS的兼容性
node的版本需要支持 async/await。如果版本号大于8的基本都是可用的。
本书中使用的版本号是8.6(并不是因为该版本有什么特殊性):
node --version
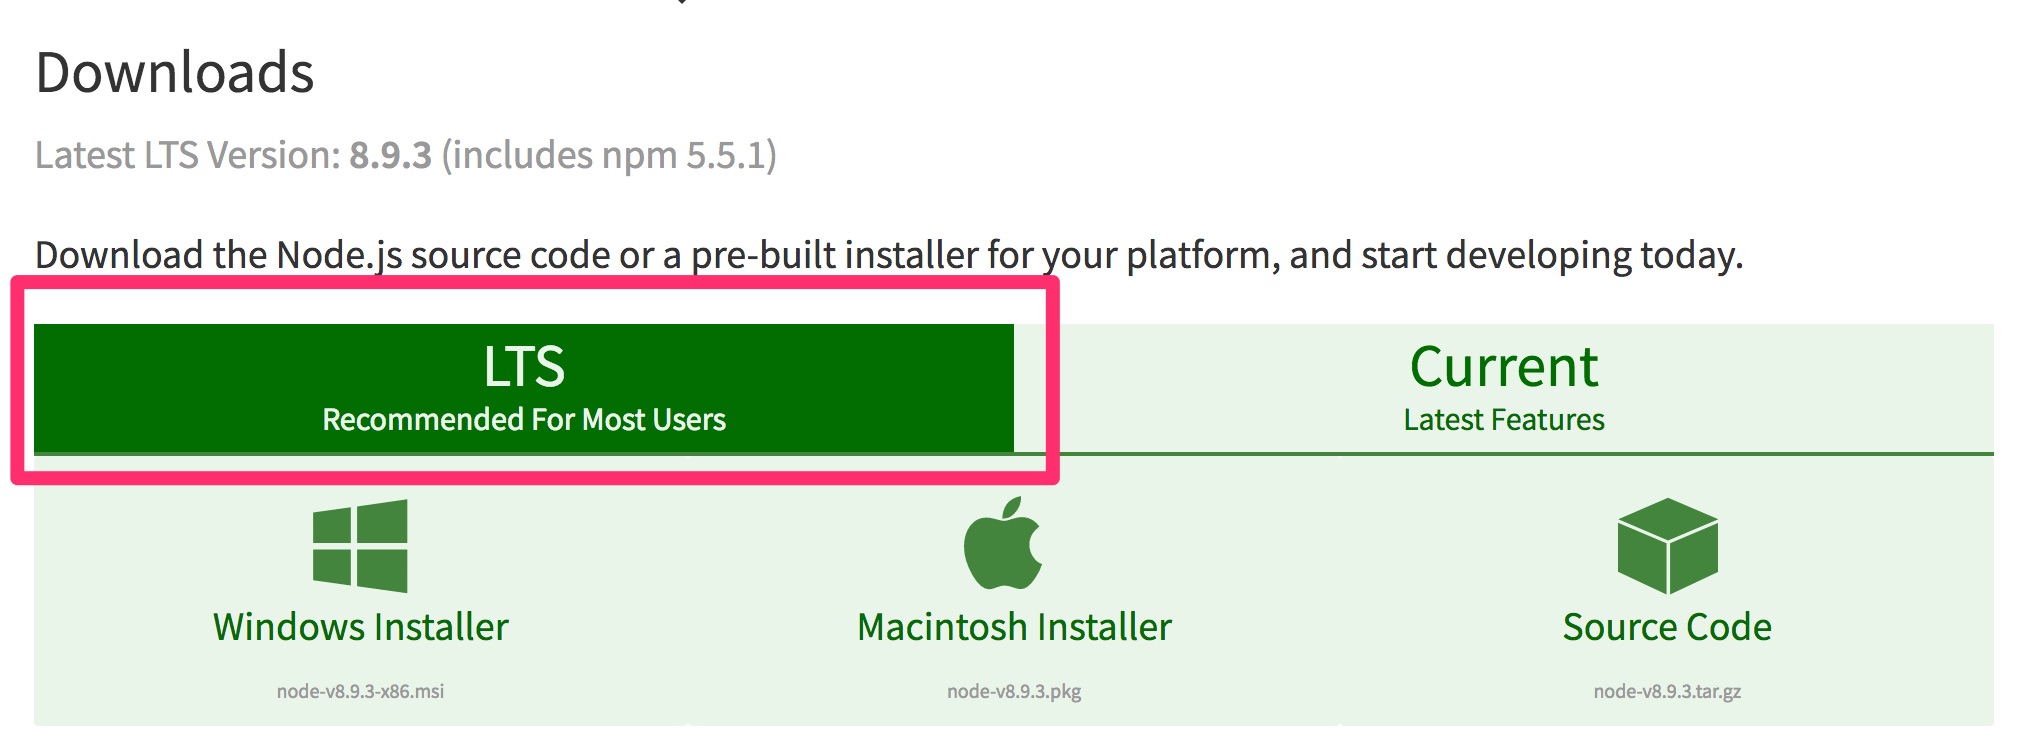
v8.6.0推荐开发者下载 Long Term Support 版本(8.9.3):
可以通过进入node REPL来测试是否支持 async/await:
$ node然后创建一个async函数:
> async () => { }
[AsyncFunction]
如果出于某种原因,你需要在一个不支持async/await的平台上运行qtumjs,请 create an issue。
代码编辑器注意事项
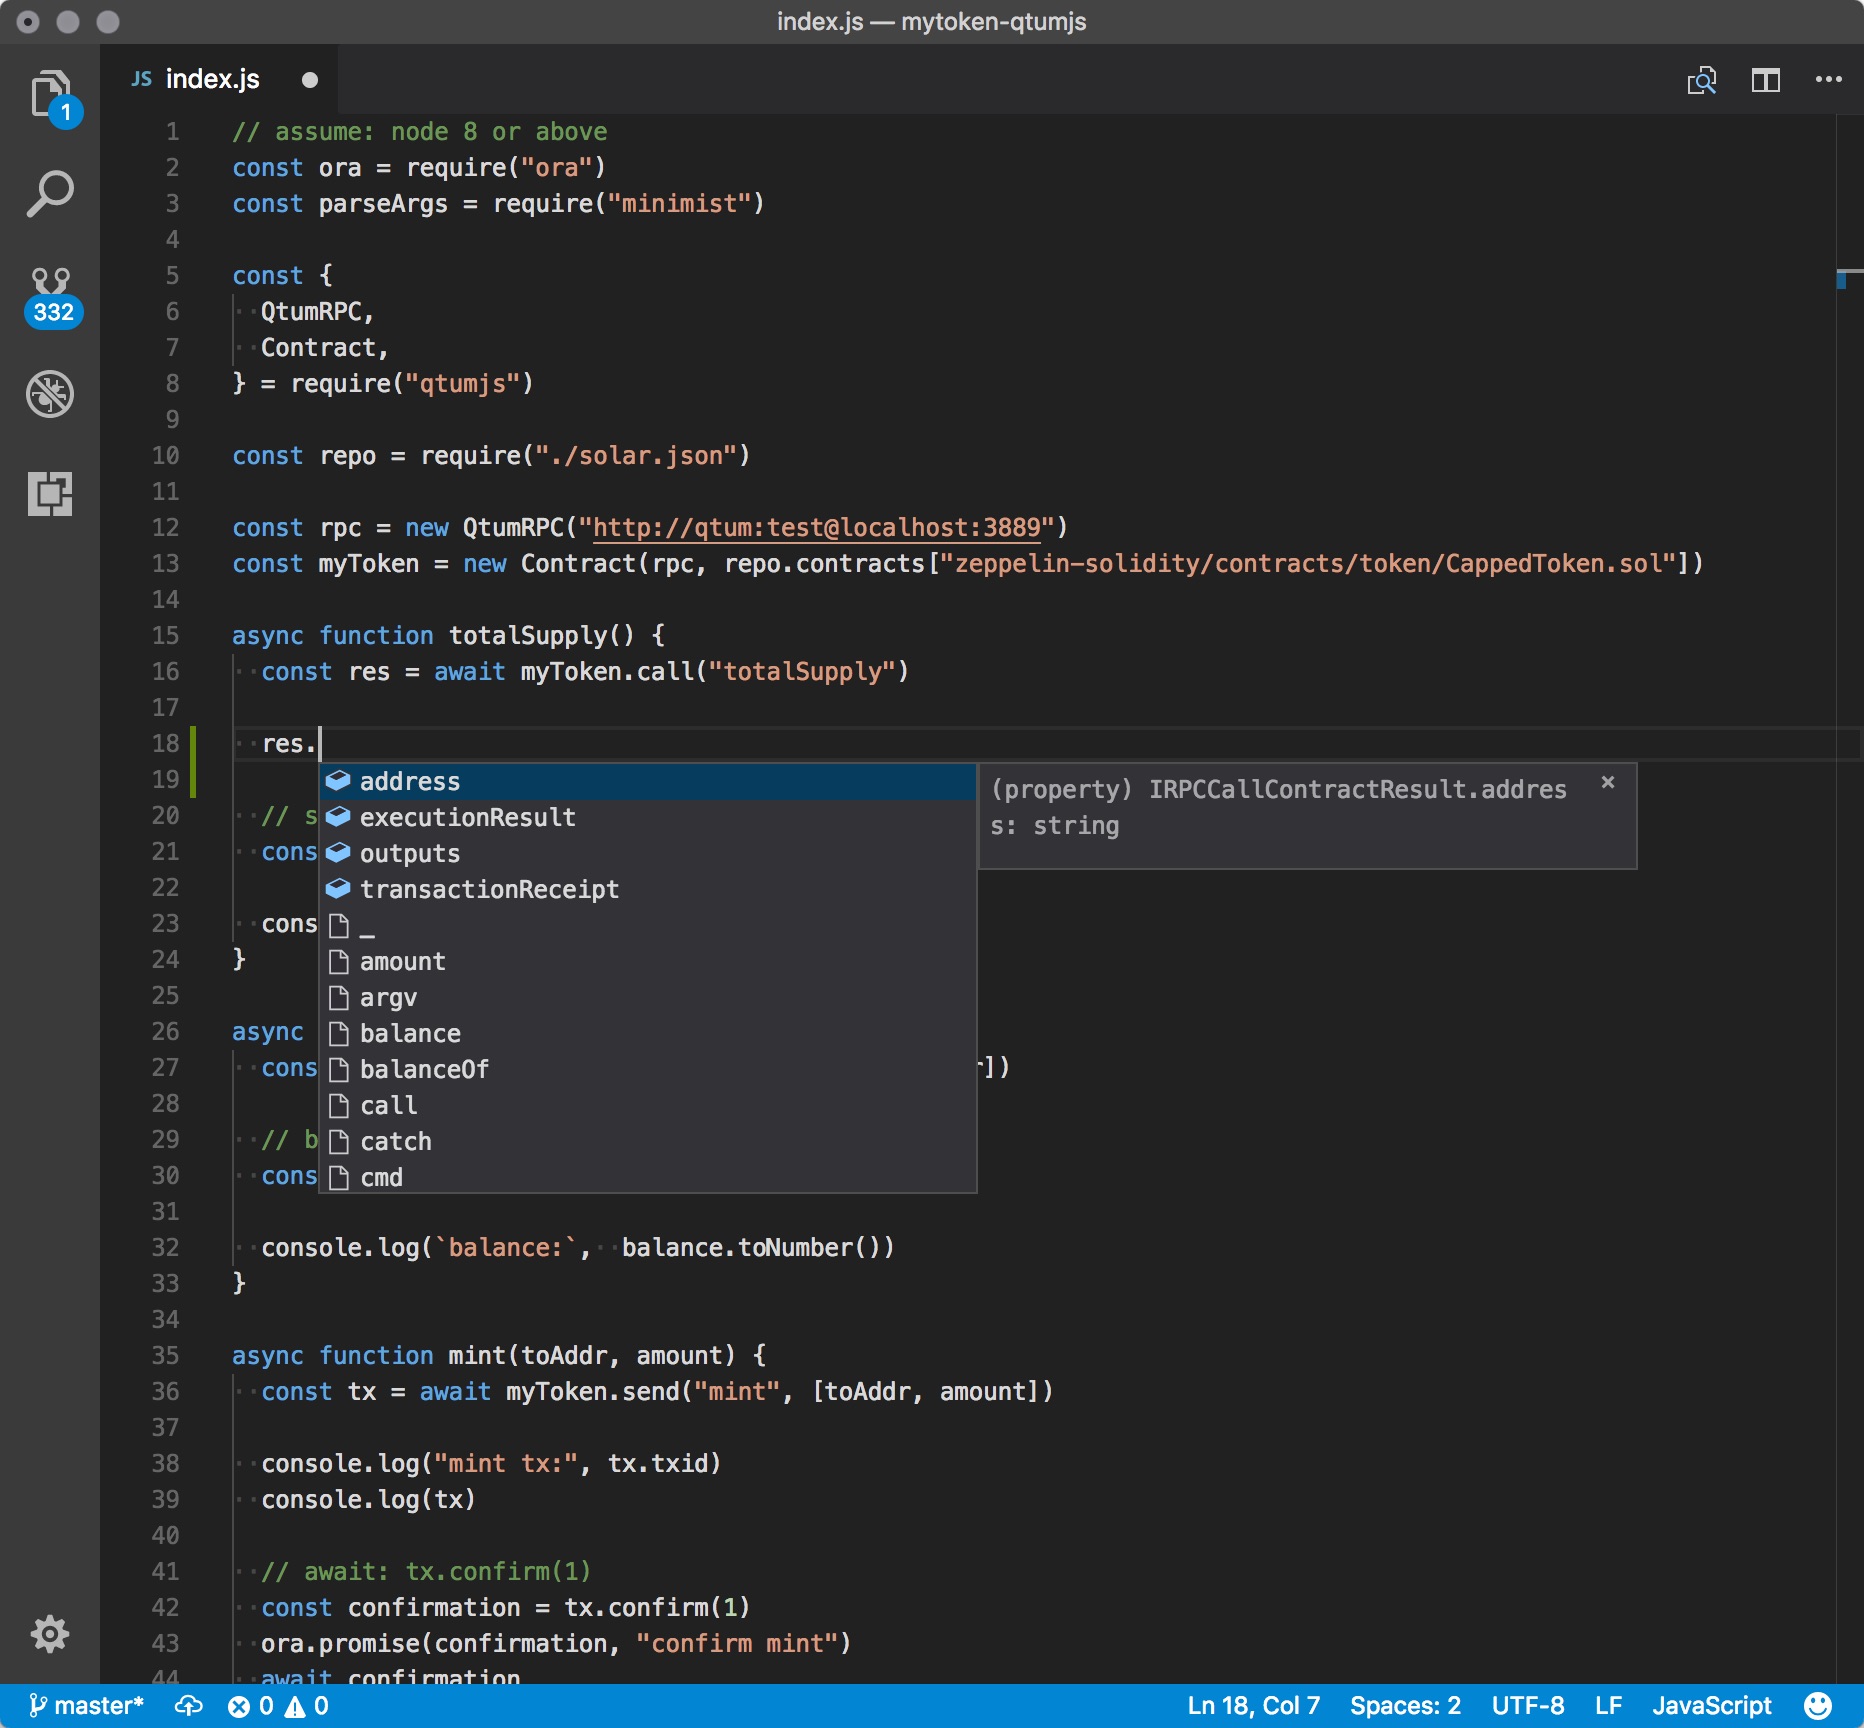
对于现代JavaScript开发,本书推荐使用 VSCode 。qtumjs的API带有静态类型定义,并且使用VSCode时,不需要UX bloat就能获得一些最有用的IDE特性(例如自动完成类型精确):
开发者也可以尝试使用 TypeScript !JavaScript实际上是一种非常强大的语言。TypeScript是一个成熟的版本,但它同样保留了JavaScript语言的灵活性。
接下来,我们回到QTUM :p
设置ERC20 CLI Project
首先,复制NodeJS project到目录mytoken-js下:
git clone https://github.com/qtumproject/qtumbook-mytoken-qtumjs-cli.git mytoken-js该project的dependencies项在package.json中列出:
{
  ...

  "dependencies": {
    "minimist": "^1.2.0",
    "ora": "^1.3.0",
    "qtumjs": "^1.4.1"
  }
}安装这些dependencies:
npm install或者根据开发者的喜好,也可以使用
yarn install。 参见: https://yarnpkg.com/en/docs/install
获取总供应量
下面,我们尝试获取token的总供应量。运行脚本 index.js:
node index.js supply

Error: Cannot find module './solar.json'
出现上述错误是因为脚本需要加载已部署合约的相关信息。
// Load deployment information generated by solar
const repo = require("./solar.json")

// Contract needs the contract address, owner address, and ABI.
const myToken = new Contract(rpc, repo.contracts[
  "zeppelin-solidity/contracts/token/CappedToken.sol"
])require函数将solar.json作为一个JavaScript对象加载进来。
开发者同样也可以将前面章节中生成的solar.development.json 直接链接(或者复制)到project目录下作为solar.json:
ln -s ~/qtumbook/examples/mytoken/solar.development.json solar.json参见示例 solar.development.json 文件
现在再次尝试运行脚本index.js:
node index.js supply

supply 14000
这样就可以正常工作了。
调用一个只读Method
我们通常所说的Solidity method如下:
function totalSupply() public view returns(uint256)ABI的定义(从solar.json中加载的)如下:
{
  "name": "totalSupply",
  "type": "function",
  "payable": false,
  "inputs": [],
  "outputs": [
    {
      "name": "",
      "type": "uint256",
      "indexed": false
    }
  ],
  "constant": true,
  "anonymous": false
}并使用JavaScript调用该method:
// const myToken = new Contract( ... )

async function totalSupply() {
  const result = await myToken.call("totalSupply")

  // supply is a BigNumber instance (see: bn.js)
  const supply = result.outputs[0]

  console.log("supply", supply.toNumber())
}myToken.call("totalSupply")返回一个 Promise, 并且await是一种syntatic sugar,它需要等待异步计算,然后才返回结果。- 在JavaScript中使用 BigNumber 表示Solidity的numbers (int, uint, etc.)。
result对象除了返回值以外,还包含其他有用的信息。
通过console.log(result)可将result中的信息打印出来:
{ address: 'a778c05f1d0f70f1133f4bbf78c1a9a7bf84aed3',
  executionResult:
   { gasUsed: 21689,
     excepted: 'None',
     newAddress: 'a778c05f1d0f70f1133f4bbf78c1a9a7bf84aed3',
     output: '00000000000000000000000000000000000000000000000000000000000036b0',
     codeDeposit: 0,
     gasRefunded: 0,
     depositSize: 0,
     gasForDeposit: 0 },
  transactionReceipt:
   { stateRoot: '5a0d9cd5df18165c75755f4345ca81da94f9247c1c031171fd6e2ce1a368844c',
     gasUsed: 21689,
     bloom: '0000000000000000000000000000000000000000000000000000000000000000000000000000000000000000000000000000000000000000000000000000000000000000000000000000000000000000000000000000000000000000000000000000000000000000000000000000000000000000000000000000000000000000000000000000000000000000000000000000000000000000000000000000000000000000000000000000000000000000000000000000000000000000000000000000000000000000000000000000000000000000000000000000000000000000000000000000000
0000000000000000000000000000000000000000000000000',
     log: [] },
outputs: [ <BN: 36b0> ] }如果将鼠标的光标悬停在result变量上,就会显示该变量的类型为IContractCallDecodedResult:
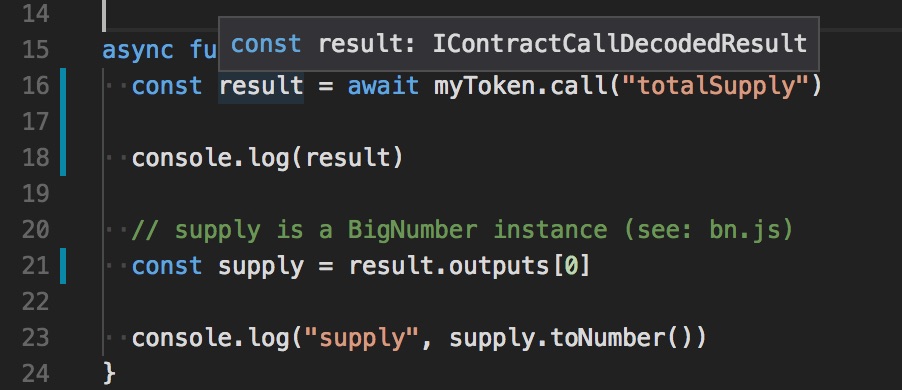
IContractCallDecodedResult 的类型定义:
export interface IContractCallDecodedResult extends IRPCCallContractResult {
    outputs: any[];
}

export interface IRPCCallContractResult {
    address: string;
    executionResult: IExecutionResult;
    transactionReceipt: {
        stateRoot: string;
        gasUsed: string;
        bloom: string;
        log: any[];
    };
}

export interface IExecutionResult {
    gasUsed: number;
    excepted: string;
    newAddress: string;
    output: string;
    codeDeposit: number;
    gasRefunded: number;
    depositSize: number;
    gasForDeposit: number;
}
带参数的Method调用
balance 子命令可用于查询一个账户上有多少个token:
node index.js balance dcd32b87270aeb980333213da2549c9907e09e94

balance: 13700
实现该功能的JavaScript代码如下:
async function balanceOf(owner) {
  const res = await myToken.call("balanceOf", [owner])

  // balance is a BigNumber instance (see: bn.js)
  const balance = res.outputs[0]

  console.log(`balance:`,  balance.toNumber())
}参数是以一个数组的方式传入balanceOf。
Send(发送) VS Call(调用)
令人困惑的是,调用method有两种方法:send和call。这两个名字都是从以太坊继承而来。一种更详细的区别二者的命名方法可能是,调用send是对应“commit”,而调用call则对应“query”。
call(或 "query"):以一种仿真的形式,在你自己的本地qtumd节点上运行合约代码,并返回结果,但是不会改变区块链。使用call是免费的。send(或 "commit"):创建一个实际的交易,该交易会在网络上全局地运行代码,并改变区块链。使用send会消耗gas。
下一步,我们将使用qtumjs来铸造一些新的token。由于铸造新的token会改变区块链,因此使用send调用方法。
调用Send铸造Tokens
mint命令通过调用send创建一个新的交易来创建新的token。然后等待交易被确认:
node index.js mint dcd32b87270aeb980333213da2549c9907e09e94 10000

mint tx: 469d0e6a1e1a421c84cd009b983fc153aa5db7da26fa1f89837f2731fa75586c
{ amount: 0,
  fee: -0.081064,
  confirmations: 0,
  trusted: true,
  txid: '469d0e6a1e1a421c84cd009b983fc153aa5db7da26fa1f89837f2731fa75586c',
  walletconflicts: [],
  time: 1514442911,
  timereceived: 1514442911,
  'bip125-replaceable': 'no',
  details:
   [ { account: '',
       category: 'send',
       amount: 0,
       vout: 0,
       fee: -0.081064,
       abandoned: false } ],
  hex: '02000000014d195e5308764e1f64236c64b8975030dd8b8815d7cfa88ee838c029e64fa03f0200000047463043022052a137063b24e74c3953891230dae739ae3adfa2144c91805de4e46ae7c4b152021f0ccdf1b3e4dd86de7777f437447dd147955e9e112c2607bfd67ddc4e7d6e2001feffffff02000000000000000063010403400d0301284440c10f19000000000000000000000000dcd32b87270aeb980333213da2549c9907e09e94000000000000000000000000000000000000000000000000000000000000271014a778c05f1d0f70f1133f4bbf78c1a9a7bf84aed3c2606ecea8d1010000
1976a914dcd32b87270aeb980333213da2549c9907e09e9488acc3080000',
  method: 'mint',
  confirm: [Function: confirm] }
✔ confirm mint
并且可以看到,余额已经增加了:
node index.js balance dcd32b87270aeb980333213da2549c9907e09e94

balance: 23700mint函数源代码如下:
async function mint(toAddr, amount) {
  const tx = await myToken.send("mint", [toAddr, amount])

  console.log("mint tx:", tx.txid)
  console.log(tx)

  await tx.confirm(1)
}tx为已经提交的交易。tx.confirm(1)是一个Promise,当交易得到1个确认,它就会产生返回值。
Token转账(Transfer)
我们将token从dcd32...9e94 转移到另一个账户。合约的transfer method有两个参数:
_totoken的接收方地址。_value转移的token的数量。
function transfer(address _to, uint256 _value) public returns (bool) {
  require(_to != address(0));
  require(_value <= balances[msg.sender]);

  // SafeMath.sub will throw if there is not enough balance.
  balances[msg.sender] = balances[msg.sender].sub(_value);
  balances[_to] = balances[_to].add(_value);
  Transfer(msg.sender, _to, _value);
  return true;
}注意,该API不需要_from 地址。因为msg.sender被认为是转移的token的来源。
这里再次出现了msg.sender。
我们在 Owner地址 一节中提到过,QTUM实际上并没有账户的概念,msg.sender就是用于交易支付的UTXO地址。
为了成为dcb3...9e94,我们需要显示地指定某个UTXO具有相同的地址。可以通过使用senderAddress选项来实现这一点。
async function transfer(fromAddr, toAddr, amount) {
  const tx = await myToken.send("transfer", [toAddr, amount], {
    senderAddress: fromAddr,
  })

  console.log("transfer tx:", tx.txid)
  console.log(tx)

  // or: await tx.confirm(1)
  const confirmation = tx.confirm(1)
  ora.promise(confirmation, "confirm transfer")
  await confirmation
}在上述代码中,send的第三个参数可以是由开发者自己指定的msg.sender。但是记住要 prefund (预先发送一些QTUM)到该地址,使其有可用的UTXO。
对于send调用,还有一些其他可以指定的选项。完全地类型定义是 IContractSendRequestOptions:
export interface IContractSendRequestOptions {
  /**
   * The amount in QTUM to send. eg 0.1, default: 0
   */
  amount?: number | string

  /**
   * gasLimit, default: 200000, max: 40000000
   */
  gasLimit?: number

  /**
   * Qtum price per gas unit, default: 0.00000001, min:0.00000001
   */
  gasPrice?: number | string

  /**
   * The quantum address that will be used as sender.
   */
  senderAddress?: string
}
为了测试 transfer功能,我们生成一个新的接收方地址,并将其转换为十六进制格式:
qcli getnewaddress
qXuvswhQ9Vjza8AFj1vmUL4N531CDVoWsz

qcli gethexaddress qXuvswhQ9Vjza8AFj1vmUL4N531CDVoWsz
9d748f98e65c6875dbed7bfb6ffbeca426ff9cc6从dcb3...9e94地址转移100个token过来:
node index.js transfer \
 qdgznat81MfTHZUrQrLZDZteAx212X4Wjj \
 9d748f98e65c6875dbed7bfb6ffbeca426ff9cc6 \
 100

transfer tx: a1ba017b3974b98bf9c8edc824c3abc0ce17678a14e7cfac94b5900a290bdd07
✔ confirm transfer注意到发送方的地址必须使用base58地址格式,这一点我们未来会解决。参见:qtumjs issues#2
然后就可以验证9d74...9cc6地址上确实已经接收到了这些token:
node index.js balance 9d748f98e65c6875dbed7bfb6ffbeca426ff9cc6

balance: 100
并且,原来的账户余额会减少100个token:
node index.js balance dcd32b87270aeb980333213da2549c9907e09e94

balance: 23600
观察合约Events
CappedToken合约定义了一些events。无论什么时候当资金从一个账户转移到另一个账户时(也包括铸造新的token时),就会触发Transfer event。Transfer event如下:
event Transfer(
  address indexed from,
  address indexed to,
  uint256 value
);
可使用qtumjs订阅合约event流,这样当一个transfer出现的时候我们就可以及时作出反应。实现代码:
async function streamEvents() {
  console.log("Subscribed to contract events")
  console.log("Ctrl-C to terminate events subscription")

  myToken.onLog((entry) => {
    console.log(entry)
  }, { minconf: 1 })
}接下来看看它怎么运转。启动events订阅:
node index.js events

Subscribed to contract events
Ctrl-C to terminate events subscription
该程序挂起,等待新的events出现。在另一个terminal(终端)中,铸造更多的token:
node index.js mint dcd32b87270aeb980333213da2549c9907e09e94 10000

mint tx: c0e3007178a1b9e05b33e770f7a0e7d084f2d06732658524be042dc0e9864cc4等待确认。在events 所在的terminal上,可以看到Mint和Transferevents都被打印出来:
{ blockHash: 'd8135a1a0e4cddb82a6912fc7eb2bd7f717b7e85069dc2fa3b8f0f8c02acbd17',
  blockNumber: 2372,
  transactionHash: 'c0e3007178a1b9e05b33e770f7a0e7d084f2d06732658524be042dc0e9864cc4',
  transactionIndex: 2,
  from: 'dcd32b87270aeb980333213da2549c9907e09e94',
  to: 'a778c05f1d0f70f1133f4bbf78c1a9a7bf84aed3',
  cumulativeGasUsed: 39306,
  gasUsed: 39306,
  contractAddress: 'a778c05f1d0f70f1133f4bbf78c1a9a7bf84aed3',
  topics:
   [ '0f6798a560793a54c3bcfe86a93cde1e73087d944c0ea20544137d4121396885',
     '000000000000000000000000dcd32b87270aeb980333213da2549c9907e09e94' ],
  data: '0000000000000000000000000000000000000000000000000000000000002710',
  event:
   { type: 'Mint',
     to: '0xdcd32b87270aeb980333213da2549c9907e09e94',
     amount: <BN: 2710> } }
{ blockHash: 'd8135a1a0e4cddb82a6912fc7eb2bd7f717b7e85069dc2fa3b8f0f8c02acbd17',
  blockNumber: 2372,
  transactionHash: 'c0e3007178a1b9e05b33e770f7a0e7d084f2d06732658524be042dc0e9864cc4',
  transactionIndex: 2,
  from: 'dcd32b87270aeb980333213da2549c9907e09e94',
  to: 'a778c05f1d0f70f1133f4bbf78c1a9a7bf84aed3',
  cumulativeGasUsed: 39306,
  gasUsed: 39306,
  contractAddress: 'a778c05f1d0f70f1133f4bbf78c1a9a7bf84aed3',
  topics:
   [ 'ddf252ad1be2c89b69c2b068fc378daa952ba7f163c4a11628f55a4df523b3ef',
     '0000000000000000000000000000000000000000000000000000000000000000',
     '000000000000000000000000dcd32b87270aeb980333213da2549c9907e09e94' ],
  data: '0000000000000000000000000000000000000000000000000000000000002710',
  event:
   { type: 'Transfer',
     from: '0x0000000000000000000000000000000000000000',
     to: '0xdcd32b87270aeb980333213da2549c9907e09e94',
     value: <BN: 2710> } }
如果开发者运行的是自己的qtumd节点,而不是提供的docker镜像,那么开发者需要启动
-logevents以使events日志工作。参见:qtum-docker/dapp。
总结
在本章中,我们开发了一个简单的NodeJS CLI工具,用于和ERC20合约进行交互。
- qtumjs是一个基于Promise的API。使用async/await编写干净的异步代码。
- 调用
call类似于“query”,而调用send类似于“commit”。 - 在调用
call或send时,使用senderAddress指定msg.owner。
现在你们已经知道怎样使用qtumjs,可以准备构建DApp了。